참고 사이트 https://www.bignerdranch.com/blog/splash-screens-the-right-way/
샘플 소스 https://github.com/cstew/Splash
샘플소스에서 주요 파일 경로
SplashActivity.java
Splash/app/src/main/java/com/bignerdranch/android/splash/
background_splash.xml
Splash/app/src/main/res/drawable/
colors.xml, styles.xml
Splash/app/src/main/res/values/
안드로이드 해상도
MDPI: Portrait: 320x480px. Landscape: 480x320px.
HDPI: Portrait: 480x800px. Landscape: 800x480px.
XHDPI: Portrait: 720px1280px. Landscape: 1280x720px.
XXHDPI: Portrait: 960px1600px. Landscape: 1600x960px.
XXXHDPI: Portrait: 1280px1920px. Landscape: 1920x1280px.
ios에서는 launch image.
xcode에서는 어렵지 않게 등록했지만 안드로이드에서는 약간의? 작업이 필요했다.
위의 가이드에서는 앱 시작 시 로딩이 필요한 시간만큼 런치 이미지를 띄우는 방식이다. 딱 봐도 이상적인 방법이므로 적용하기로 했다.
(cocos2dx에서의 구현도 가능하지만 강제 딜레이를 주는 방식 이외의 방법을 찾아내지 못했다..)
- 필요한 xml 파일들.
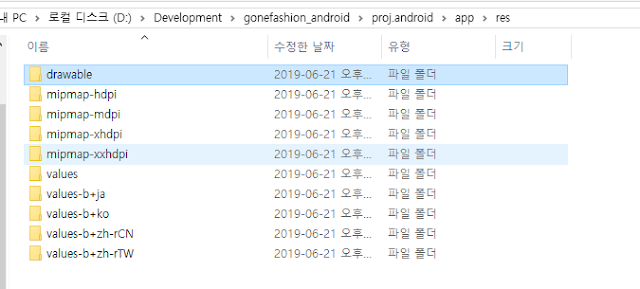
background_splash.xml - drawble 폴더에 넣어준다.
(Android Studio 3.4.1에는 drawable폴더 만들기가 없다. 그래서 그냥 만들어줌.)
colors.xml, styles.xml - values 폴더에 넣어준다.
- SplashActivity.java
소스를 보니 메인 Activity를 호출하는 역할인듯..
AppActivity와 같은 경로에 넣어준다.
에러
위에서 추가한 values/style.xml에서 'AppCompat'관련 error가 나왔다.
해결 방법 : build.gradle(Module:gonfashion_android)에 아래 도구를 추가해주고 synk.
dependencies {
    implementation fileTree(dir: 'libs', include: ['*.jar'])
    implementation project(':libcocos2dx')

    implementation 'com.android.support:appcompat-v7:26.1.0' // 추가.
    implementation 'com.google.firebase:firebase-core:16.0.9'
    implementation 'com.google.firebase:firebase-ads:17.2.1'
}
- AndroidManjfest.xml 편집
이 부분이 중요하다. 메인 AppActivity를 SplashActivity로 대체 한 후, 소스 아래에 메인 AppActivity를 별도로 추가해야 된다.
        <!-- name : SplashActivity 수정, theme : SplashTheme 수정 -->
        <activity
            android:name="org.cocos2dx.cpp.SplashActivity"
            android:screenOrientation="portrait"
            android:configChanges="orientation|keyboardHidden|screenSize"
            android:label="@string/app_name"
            android:theme="@style/SplashTheme"
            android:launchMode="singleTask"
            android:taskAffinity="" >
            <intent-filter>
                <action android:name="android.intent.action.MAIN" />

                <category android:name="android.intent.category.LAUNCHER" />
            </intent-filter>
        </activity>

        <!-- launchMode 등등은 삭제하지 않을 경우 앱아이콘이 2개가 되거나 런치 이미지가 동작하지 않는다. -->
        <activity
            android:name="org.cocos2dx.cpp.AppActivity"
            android:screenOrientation="portrait"
            android:configChanges="orientation|keyboardHidden|screenSize"
            android:label="@string/app_name"
            android:theme="@android:style/Theme.NoTitleBar.Fullscreen">
        </activity>
- launch image를 launch logo로 대체
기기별 해상도에 맞게 런치 이미지를 만들고 테스트를 해보니 화면에 꽉 차지 않는 문제가 발생했다.
drawable/background_splash.xml의 옵션값을 바꿔도 해결이 되지 않았기 때문에, 아예 로고만 짤라서 넣기로 했다. - values/colors.xml에서 배경색을 지정할 수 있기 때문에 효과적.
수정해본 옵션값에 대해
- 아래 android:gravity를 "center|fill"로 바꾸면 화면에 꽉 차긴 하지만 이미지가 왜곡된다.
수정해본 옵션값에 대해
- 아래 android:gravity를 "center|fill"로 바꾸면 화면에 꽉 차긴 하지만 이미지가 왜곡된다.
    <item>
        <bitmap
            android:gravity="center"
            android:src="@mipmap/logo"/>
    </item>
런치 로고(이미지) 제작. -이미지 이름은 바뀌면 안된다.


런치 로고 이미지 등록 - 아래 android:src"@mipmap/이미지 이름"


런치 로고 이미지 등록 - 아래 android:src"@mipmap/이미지 이름"
<?xml version="1.0" encoding="utf-8"?>
<layer-list xmlns:android="http://schemas.android.com/apk/res/android">

    <item
        android:drawable="@color/gray"/>

    <item>
        <bitmap
            android:gravity="center"
            android:src="@mipmap/logo"/>
    </item>

</layer-list>
결과


댓글
댓글 쓰기